サポート
Aganim AI Shopifyアプリの機能ガイド、プラン対応状況、トラブルシューティング、FAQ。
機能ドキュメント
各機能にはプラン対応、ステップバイステップの使い方、よくある対処法が含まれています。

Brand Soul
ブランドアイデンティティを定義 — アーキタイプ、トーン、パワーワード、禁止フレーズ、文化的タッチポ�イント — すべてのAI生成コンテンツに反映。
Brand Soul
ブランドアイデンティティを定義 — アーキタイプ、トーン、パワーワード、禁止フレーズ、文化的タッチポ�イント — すべてのAI生成コンテンツに反映。
- ストアを分析し、ブランドプロフィールを生成: アーキタイプ、トーン、パワーワード、禁止フレーズ、コアバリュープロポジション、文化的タッチポイント。
- ブランドコンテキストは自動的に全AI機能に反映 — リライト、ミッション、マーケティングコピー、コンテンツテンプレート。
- ブランドロゴ(PNG、JPG、または WebP)をアップロードして、Informativeスタイルのヒーローバナーで使用。
- ホームページから Brand Soul に移動。
- 「ブランド情報を編集」をクリックして Brand Soul ウィザードを開く。
- ウィザードに従う — AIがストアを分析し、ブランドインテリジェンスを生成。
- 生成されたプロフィールを確認: アーキタイプ、トーンガイドライン、パワーワード、禁止フレーズ、バリュープロポジション、文化的タッチポイント。
- ヒーローバナー生成用にブランドロゴをアップロード。
- ブランドソウルのグローバル有効/無効は、ダッシュボードのBrand Soulカードのトグルで切り替えられます。有効にすると、すべてのAI機能にブランドコンテキストが自動適用されます。
- ダッシュボードトグル: ダッシュボードからBrand Soulのグローバル有効/無効を切り替えられます。有効にすると、すべてのAI機能がブランドコンテキストを自動使用します。
- リライター(最も強い効果): ブランドストーリー、ピラー、哲学がLLMプロンプトに注入され、ブランドの事実を商品説明に自然に織り込むよう厳密に指示されます。「会社概要」のコピペではなく、商品の特徴の理由を説明する形で反映されます。
- ミッション: ミッションパイプラインでエージェントが実行されると、ブランドコンテキストが自動的に注入されます。チェーン内のすべてのエージェントがブランドプロフィールの恩恵を受けます。
- コンテンツテンプレート: ブログ記事、ヒーローセクション、コレクション説明はブランドボイスを反映します。
- ヒーローバナー: アップロードしたロゴは、ヒーローセクションとコレクションの「Informative」画像スタイルに表示されます。
- 画像リファインメント&マーケティング画像: 短いブランド美学ヒント(アーキタイプ+パワーワード)が画像プロンプトに追加されます(例:「Heritage House. heritage, master artisans, meticulous, Ichigo Ichie, heirlooms aesthetic.」)。これにより画像モデルに微妙なスタイルの方向性が与えられます。
- マーケティング広告(Ideogram): ブランド美学が広告合成プロンプトに注入され、生成されるタイポグラフィ広告のビジュアルスタイルとトーンに影響を与えます。
- 注意: �画像モデルはテキストのリライターよりもBrand Soulに対して微妙に反応します。ビジュアルの違いはPremiumやNaturalテーマで最も顕著で、美学ヒントがシーンスタイリングを補完します。Clean StudioやMinimalistテーマでは、デザイン上効果は最小限です。
ブランドインテリジェンスが「生成中...」のまま
- 最大2分待つ — ページは自動で更新をポーリングします。
- ページを更新してステータスを確認。
- まだ進まない場合は、ウィザードを再実行してください。
ロゴのアップロードに失敗。
- PNG、JPG、または WebP 形式であることを確認。
- タイムアウトする場合は小さいファイルを試す。
生成されたブランドプロフィールは編集できますか?
Brand Soulはどのくらいの頻度で再実行すべきですか?
ロゴはどこで使われますか?
Brand Soulの有効/無効はどこで切り替えますか?
Rewriter Workspace
市場ごとにローカライズされた下書き(タイトル + HTML説明文 + SEOタイトル/メタ)を生成し、翻訳をShopifyに保存。
Rewriter Workspace
市場ごとにローカライズされた下書き(タイトル + HTML説明文 + SEOタイトル/メタ)を生成し、翻訳をShopifyに保存。
- 商品をグローバル市場向けに最適化するワークスペース(ロケールごと)。
- 生成内容: タイトル、HTML説明文、SEOタイトル、メタディスクリプション、任意のSEO Altテキスト。
- ロケールごとの編集に対応し、各市場に合わせたメッセージとSEOを調整可能。
- リライターを開き、商品を選択。
- ターゲット市場/ロケールを選択。(Basic: 1ロケール。Standard/Pro: マルチロケール。)
- 最適化設定(トーン、単位、関連性の低いコンテンツ削除)を設定。
- 「グローバル向けに最適化」をクリックして下書きを生成。
- アクティブロケールの下書きを確認・編集(タイトル、HTML、SEOフィールド)。
- 必要に応じて日本の価値インサイトを追加して根拠と差別化を強化。
- 「Shopifyに保存」をクリックして、そのロケールの翻訳とSEOフィールドを保存。
| 機能 | Basic | Standard | Pro | 備考 |
|---|---|---|---|---|
| AI「グローバル向けに最適化」(下書きタイトル + HTML説明文 + SEOタイトル/説明) | ✅ | ✅ | ✅ | ローカライズされたタイトル、説明文、SEOメタデータを生成。 |
| リライト市場選択(公開ロケール) | ✅(1ロケール) | ✅(複数) | ✅(複数) | Basicは1回の実行で1ロケールに制限。 |
| ワンクリックでマルチマーケット一括生成 | ❌ | ✅ | ✅ | 複数ロケールのコンテンツを同時生成。 |
| トーン / 市場ペルソナ / ブランドトーン選択 | ❌(Professional固定) | ✅ | ✅ | BasicはProfessional固定。Standard/ProはProfessional/Luxury/Minimalist/Playfulを選択可能。 |
| 単位をUSスタンダードに自動変換(ENのみ) | ✅ | ✅ | ✅ | メトリック値を維持し、括弧内にUS換算値を追加。 |
| ブランドソウルで強化 | ✅ | ✅ | ✅ | ブランドストーリーとボイスをリライトに反映。 |
| SEO詳細エディター(SEOタイトル + メタディスクリプション + SERPプレビュー) | ✅ | ✅ | ✅ | ロケールごとに編集可能。Shopifyに保存。 |
| Shopifyに保存(翻訳 + SEOフィールド) | ✅ | ✅ | ✅ | 非プライマリロケールにはダイジェストベースの翻訳を使用。 |
| キーディテール(ニュアンス)/「検証済み日本の価値」パネル | ✅ | ✅ | ✅ | バックエンドで検出された価値に基づく。フッターを追加してメタフィールドに保存可能。 |
| 商品説明変更時の自動リセット | ✅ | ✅ | ✅ | 手動変更を検出し、古いコンテキスト/下書きをリセット。 |
複数ロケールを選択できない。
- Shopify設定で追加の市場/ロケールを公開。
- マルチロケール一括実行には Standard または Pro にアップグレード。
保存に失敗した、またはShopifyにコンテンツが表示されない。
- アプリから保存中にShopifyで同じ商品を編集しない。
- 最適化を再実行して保存を再度試す。
元の商品コンテンツは上書きされますか?
保存前に出力を編集できますか?
Writing Studio
商品リライター、コンテンツテンプレート、画像リファインメントのハブ — AIライティングとビジュアルツールを一元管理。
Writing Studio
商品リライター、コンテンツテンプレート、画像リファインメントのハブ — AIライティングとビジュアルツールを一元管理。
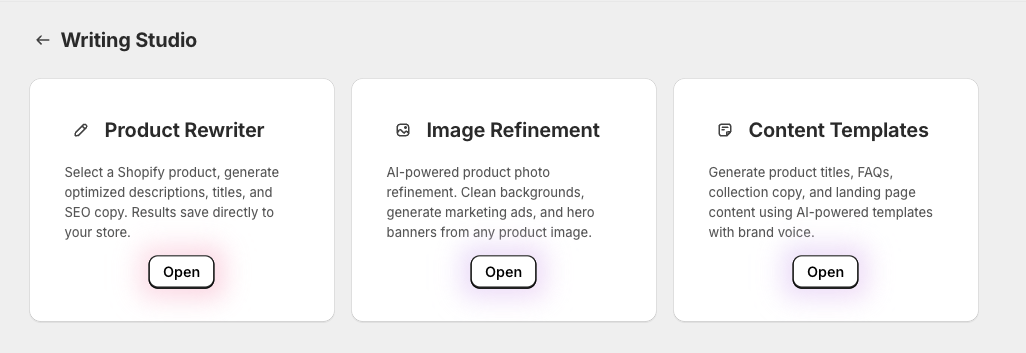
- 3つのサブ機能を統合する中央ハブ: 商品リライター、コンテンツテンプレート、画像リファインメント。
- 1ページからすべてのライティング・ビジュアルツールにアクセス。
- ナビゲーションメニューから Writing Studio を開く。
- サブ機能を選択: 商品リライター、コンテンツテンプレート、または画像リファインメント。
- 各サブ機能は専用ワークスペースでフル機能を提供。
サブ機能カードがロック表示。
- 各カードのプランバッジで必要プランを確認。
- プランをアップグレードして機能を解除。
商品リライターとコンテンツテンプレートの違いは?
Content Templates
AIテンプレートとブランドボイスで、商品FAQ、ヒーローセクション、ブランドブログ記事、コレクション説明を生成。
Content Templates
AIテンプレートとブランドボイスで、商品FAQ、ヒーローセクション、ブランドブログ記事、コレクション説明を生成。
- 商品とストア向けの新規コンテンツを生成するAIテンプレート。
- 4種類: 商品FAQ、ヒーローセクション、ブランドブログ記事、コレクション説明。
- 各テンプレートはShopifyに直接公開可能(商品本文、ブログ記事、コレクション)。
- 任意で商品画像をアップロードして生成ヒーローバナーにブレンド可能。
- Writing Studio → コンテンツテンプレートを開く。
- テンプレートタイプを選択(FAQ、ヒーローセクション、ブログ記事、コレクション説明)。
- 商品を選択(コレクションの場合は複数可)。
- オプションを設定: 画像スタイル、トピック、カテゴリー、オーバーレイテキストなど。
- 生成をクリック — 出力を確認・編集。
- 「Shopifyに公開」をクリックしてストアに保存。
- 商品詳細からQ&Aペアを生成 — 素材、お手入れ方法、寸法など。
- Shopifyの商品本文にHTMLとして追加して公開。
- 商品を選択して生成をクリック。出力を編集してから公開。
- シネマティックなバナー画像付きランディングページヒーローセクションを生成。
- 5つの画像スタイル: Attractive(小道具&テーマ)、Seasonal(季節感)、Minimalist(クリーン単品)、Informative(商品名&ロゴ)、Monochrome(白黒エディトリアル)。
- 商品画像をアップロードしてシーンにブレンドするか、空のままでテーマベースの画像を使用。
- 任意のオーバーレイテキストを追加(例: 「新コレクションをご覧ください」)。
- クラフト、製造工程、職人技法などについて長文ブログ記事を作成。
- トピック(例: 「薪窯焼きの工程」)と任意のカテゴリーを入力。
- AI生成ヒーローバナー付きでShopifyブログ記事として公開。
- 商品画像をアップロードしてヒーローにブレンドするか、空のままでテーマベースのバナーを使用。
- ヒーローバナー画像付きのコレクションページコピーを生成。
- コレクションに含める複数商品を選択。
- コレクション名と短い説明を入力。
- 生成された説明とバナーで新しいShopifyコレクションを作成。
生成コンテンツが空白または短すぎる。
- 商品説明に詳細を追加(素材、寸法、お手入れ、産地)。
- 再生成をクリックして新しい出力を試す。
ヒーロー画像に商品が含まれていない。
- 生成前に画像アップローダーで商品画像をアップロード。
- 鮮明な商品写真を使用(PNG、JPG、または WebP、最大10MB)。
Shopifyへの公開に失敗。
- ページを更新して再度公開を試す。
- エラーが続く場合は、ダッシュボードから再接続。
FAQはストアのどこに表示されますか?
ヒーローバナーに自分の画像をアップロードできますか?
利用可能な画像スタイルは?
Image Refinement
AI搭載の商品写真クリーンアップ — テキスト除去、背景調整、洗練された画像をShopifyに保存。
Image Refinement
AI搭載の商品写真クリーンアップ — テキスト除去、背景調整、洗練された画像をShopifyに保存。
- AIで商品画像をクリーンアップ: オーバーレイテキストを除去し、背景をブランドに合わせて調整または置換。
- 商品切り出し(背景除去)の後、AI背景再生成を使用。
- 改善された画像はShopifyの商品に新しいメディアとして保存 — 元の画像は置換されません。
- Writing Studio → 画像リファインメントを開く。
- アイキャッチ画像付きの商品を選択。
- 「最適化」をクリックしてAIリファインメントを開始。
- 改善された画像を確認(分析 → 切り出し → 再生成 → 仕上げの流れを表示)。
- 「Shopifyに保存」をクリックして、改善された画像を商品メディアとして追加。
- 改善された画像はShopifyのproductCreateMedia APIを使用して商品に新しいメディアとして追加されます。
- 元の商品画像は削除・置換されません。
- 改善された画像は一時的にCloudflare R2に保存され、その後Shopifyのメディアライブラリにアップ�ロードされます。
- Shopify管理画面の商品メディアギャラリーで新しい画像を確認できます。
- 画像リファインメントはProプラン機能です。
- Proプランには月150画像クレジットが含まれます。
- 1回のリファインメントで1クレジットを消費。
- クレジットは請求日に月次リセットされます。
「アイキャッチ画像が見つかりません」エラー。
- Shopify管理画面で商品にアイキャッチ画像を追加。
- 画像がある別の商品を選択。
リファインメントがおかしい、またはアーティファクトが出る。
- 再試行 — 実行ごとに結果が異なることがある。
- シンプルな背景の商品写真をソースとして使用。
「Shopifyに保存」に失敗。
- ページを更新して再度保存を試す。
- インターネット接続を確認して再試行。
元の商品画像は置換されますか?
改善された画像はどこに保存されますか?
クレジットはいくつありますか?
SEO
SERPプレビュー付きでSEOタイトル/メタを編集、CTRベストプラクティスを適用、競合情報を活用(Standard/Pro)、推奨に従う。
SEO
SERPプレビュー付きでSEOタイトル/メタを編集、CTRベストプラクティスを適用、競合情報を活用(Standard/Pro)、推奨に従う。
- SEO詳細でロケールごとにSEOタイトル + メタディスクリプションを編集し、Googleでの表示をプレビュー可能。
- 全プランで推奨を受け取れます。Standard/Proは競合SERPコンテキストで生成を強化可能(ベストエフォート)。
- ナビゲーションからSEOを開く、またはリライターで最適化を実行。
- 商品を選択して「SEOを最適化」をクリック。
- プレビューと文字数ガイドを見ながらSEOタイトルとメタディスクリプションを編集。
- 競合ランキング(Standard/Pro)とCTRスコアを確認。
- Shopifyに保存してそのロケールのSEOフィールドを永続化。
- 主要キーワードと明確な商品タイプで始める。
- キーワード詰め込みなしで、1つの強力な差別化要素(素材、クラフト詳細、効果)を追加。
- 可読性を保つ: タイトル約70文字、メタディスクリプション約160文字で切り捨てを避ける。
- Standard/Proは商品キーワード(商品名 + カテゴリー)のGoogleトップ結果の小規模セットを取得可能。
- これはコピーをガイドし、差別化要素を強調するためのコンテキストとして使用(コピーはしない)。
- SERP連携が利用できない場合、競合情報は表示されないことがあります(ベストエフォート)。
- 推奨はガイダンスのみ(自動上書きなし)。
- 説明文にある事実のみに基づく競合優位性と購入意図戦略の提案を含む。
- 事実を捏造せずに確信できない場合、空の推奨を返すことがあります — 具体的な事実を追加して再実行してください。
競合情報が表示されない。
- Standard/Proであることを確認。
- 競合情報はベストエフォートとして扱い、なくてもSEOエディターと推奨は使用可能。
推奨が空白または汎用的すぎる。
- 具体的な詳細を追加(素材、内容、寸法、お手入れ、産地/クラフト)。
- 最適化を再実行して推奨を再確認。
SEO結果が商品の言語と合わない。
- ダッシュボードでターゲット市場を商品の言語に合わせてください(例:日本語商品はJP)。
- ターゲット市場を変更後、SEO最適化を再実行してください。
SEO編集でページの商品タイトルは変わりますか?
推奨を採用する必要がありますか?
日本語の商品を海外市場向けにSEO最適化するには?
Japanese Value
検証済みの日本のニュアンス/クラフト詳細を検出し、根拠と差別化として説明文に追加。
Japanese Value
検証済みの日本のニュアンス/クラフト詳細を検出し、根拠と差別化として説明文に追加。
- ソーステキストから検出された職人技/文化的ニュアンスを強調し、グローバルバイヤーにとっての重要性を説明。
- 主張を捏造せずに信頼性を強化するよう設計。
- リライターで最適化を実行。
- Japanese Value / キーディテールパネルを開く。
- 根拠 + 説明 + 推奨フッター行を確認。
- インサイトを説明文に挿入してShopifyに保存。
インサイトが検出されない。
- 具体的な詳細を追加(素材、産地、方法、お手入れ、内容)。
- 最適化を再実行してニュアンスを再検出。
文化的な主張を捏造しますか?
Optimization Preferences
トーン、単位、Brand Soul連携、コンテンツクリーンアップを制御し、出力をブランドに合わせ、一般的なローカライズミスを避ける。
Optimization Preferences
トーン、単位、Brand Soul連携、コンテンツクリーンアップを制御し、出力をブランドに合わせ、一般的なローカライズミスを避ける。
- Shopifyに保存する前に生成に影響する設定。
- 含む: トーン(Standard/Pro)、EN単位変換、Brand Soul連携、関連性の低いコンテンツ削除。
- 最適化前にトーンを選択(Standard/Pro)。
- 英語ロケールで必要に応じて単位の自動変換を有効化。
- 「ブランドソウルで説明文を強化」を有効にしてリライトにブランドコンテキストを注入。
- ほとんどのストアでは関連性の低いコンテンツ削除をオンに。商品説明に意図的にポリシーブロックを含める場合のみオフに。
- 最適化、確認、必要に応じて再生成。
- Basic: Professionalトーンのみ。
- Standard/Pro: Professional、Luxury、Minimalist、Playful。
- 事実は変えずにブランドアイデンティティに合わせてトーンを使用。
- 英語ロケールで有効な��場合、メトリック値を維持しUS換算を括弧内に追加(利用可能な場合)。
- ソースに測定可能な単位がない場合、変換対象はありません。
- 有効にすると、ブランドストーリーとボイスがリライトに反映され、より豊かなストーリーテリングに。
- 事前にBrand Soulの設定が必要(ホームページからウィザードを実行)。
- 全プランで利用可能。Brand Soulインテリジェンスが生成されるまでデフォルトで無効。
- 非商品の定型文を削除し、モデルが商品の事実とセールスポイントに集中。
- ポリシーコンテンツが必要な場合は、商品説明ではなくテーマセクション/ページに保存することを推奨。
トーン選択が無効。
- 追加トーンには Standard/Pro にアップグレード。
変換�が表示されない。
- en-* ロケールで実行。
- 説明文に寸法/重量/容量の単位が含まれることを確認。
残したいコンテンツが削除された。
- 削除を無効にして最適化を再実行。
- またはポリシーコンテンツを商品説明の外(テーマセクション/ページ)に移動。
「ブランドソウルで説明文を強化」がグレーアウト。
- ホームページでBrand Soulウィザードを先に実行。
- ブランドインテリジェンス生成が完了するまで待ってからリライターに戻る。
関連性の低いコンテンツ削除はオンにすべきですか?
「ブランドソウルで説明文を強化」の効果は?
Multi Locale Editor
ロケールごとに下書きを編集し、翻訳を安全に保存(Basic: 1ロケールずつ。Standard/Pro: マルチロケール + 一括)。
Multi Locale Editor
ロケールごとに下書きを編集し、翻訳を安全に保存(Basic: 1ロケールずつ。Standard/Pro: マルチロケール + 一括)。
- 各市場に合わせたコピーとSEOを提供するロケールごとの編集・保存フロー。
- Standard/Proは1回の実行で複数ロケールを生成可能。Basicは1ロケールずつ実行。
- ロケールタブ/市場を選択。
- そのロケールのタイトル、説明文HTML、SEOフィールドを編集。
- そのロケール分をShopifyに保存。
- 他のロケールについても繰り返す(またはStandard/Proで一括生成)。
保存中にダイジェスト/ハッシュエラーが表示。
- 翻�訳保存中にShopifyでプライマリコンテンツを編集しない。
- 最適化を再実行して再度保存。
下書き/コンテキストが予期せずリセット。
- 更新されたShopify説明文で最適化を再実行。
Basicが1回の実行で1ロケールに制限される理由は?
Marketing
ソーシャルメディアキャプション、広告コピー、季節キャンペーン、メールテンプレート、ヒーロー画像を生成。
Marketing
ソーシャルメディアキャプション、広告コピー、季節キャンペーン、メールテンプレート、ヒーロー画像を生成。
- 3タブのフルマーケティングワークスペース: デジタルマーケティング、小売キャンペーン、テンプレート。
- Instagramフック/キャプション + ハッシュタグ、広告バナー、ヒーロー画像、季節キャンペーンを生成。
- メールテンプレート(ローンチ、カート放棄、ウェルカム)と広告コピー(Facebook/Instagram、Google Ads)を作成。
- 出力はShopifyメタフィールドにキャッシュして再生成なしで再利用可能。
- ナビゲーションメニューからマーケティングを開く。
- タブを選択: デジタルマーケティング、小売キャンペーン、テンプレート。
- デジタルマーケティング: 商品を選択し、ソーシャルキャプション、広告バナーを生成。Instagram/TikTok向けコンテンツをプレビュー。
- 小売キャンペーン: 季節小売カレンダーを表示、自動生成キャンペーンコード、ホリデーテーマのキャプションを取得。
- テンプレート: ワンクリックマーケティングコンテンツ — ローンチメール、カート放棄メール、ウェルカムメール、FB/IG広告、Google Ads。
- 出力をShopifyメタフィールドに保存してキャッシュ/再利用。
- Instagram/TikTok向けのソーシャルメディアキャプション、ハッシュタグ、オーバーレイ提案を生成。
- AIで広告バナーとヒーロー画像を作成。
- 公開前にソーシャルプラットフォームでの表示をプレビュー。
- 生成したフックとキャプションをShopifyメタフィールドに保存。
- 季節カレンダーで今後の小売イベントと祝日を表示。
- 割引コード提案付きの自動生成季節キャンペーンアイデアを取得。
- ホリデーテーマのキャプションとキャンペーンコンセプトを生成。
- 新しい角度が必要なときに「再チェック」でアイデアを更新。
- Launch Email: 商品発売案内メール。
- Abandoned Cart Email: 品質重視メッセージのカート回復メール。
- Welcome Email: ストアの個性に合わせた新規登録者ウェルカムメール。
- Facebook/Instagram Ad: エンゲージメント最適化のソーシャルメディア広告コピー。
- Google Ads: 高意図キーワードのGoogle検索広告コピー。
生成ボタンが無効 / コンテンツがキャッシュ表示。
- 利用可能な場合、再チェック/再生成を使用。
- 商品説明を更新してコンテキストをリフレッシュし、再度生成。
季節出力が汎用的。
- 具体的な差別化要素を追加(素材、用途、バンドル内容)。
- 季節キャンペーンを再チェック。
マーケティング結果はどこに保存されますか?
利用可能なメールテンプレートは?
Price Scout
Google検索結果から競合価格を分析し、AI搭載の価格レコメンデーションを取得。
Price Scout
Google検索結果から競合価格を分析し、AI搭載の価格レコメンデーションを取得。
- 商品名とカテゴリのGoogle Shopping検索結果から競合価格データを取得。
- Shopifyの「商品タイプ」が検索クエリに追加されます — 不正確または汎用的な商品タイプ(例:「General」)は結果の品質を低下させます。
- 競合分析に基づくAI搭載の価格レコメンデーションを提供。
- Proプランは推奨価格をShopifyに自動適用可能。
- ナビゲーションメニューから Price Scout を開く。
- 商品を選択。
- Shopifyで正確な商品タイプが設定されていることを確認してください(例:「日本酒セット」であって「General」ではなく)。これは競合検索に使用されます。
- 「価格をスカウト」をクリックして競合価格を分析。
- 競合価格とAIレコメンデーションを確認。
- 必要に応じて推奨価格をShopifyに適用(Proプラン)。
競合価格が見つからない。
- Shopifyで正確な商品タイプを設定してください(例:「酒器セット」「陶磁器」「抹茶」)。「General」のような汎用的な値は避けてください。
- 商品名が非常に長い場合、Price Scoutは自動的に短縮版で再検索します。
- 海外市場向けの日本語商品は、まずリライターで翻訳してからPrice Scoutを実行してください。
価格レコメンデーションが��高すぎる/低すぎる。
- ご自身の市場知識と合わせてレコメンデーションをガイダンスとして使用。
- 戦略に合わない場合は手動で価格を調整。
競合結果が間違った国のもの(例:日本語商品に対して米国の結果)。
- ダッシュボードでターゲット市場を商品の言語に合わせてください(例:日本語商品はJP、英語商品はEN)。
- ターゲット市場を変更後、Price Scoutを再実行してください。
- 最適な結果を得るため、ターゲット市場を商品説明の主要言語と常に一致させてください。
価格は自動で変わりますか?
どのくらいの頻度で価格をスカウトすべきですか?
日本語の商品を海外市場向けに価格分析するには?
エージェンティック・ミッション
リライター、SEO、マーケティング、価格設定、画像リファインメント、ビジュアルマーケティングを連携させたマルチエージェントAIパイプラインを実行。
エージェンティック・ミッション
リライター、SEO、マーケティング、価格設定、画像リファインメント、ビジュアルマーケティングを連携させたマルチエージェントAIパイプラインを実行。
- 複数エージェントを連携して商品をエンドツーエンドで処理するマルチステップAIパイプライン。
- プリセット・エージェンティック・ミッション(既製の組み合わせ)を選ぶか、任意のエージェント組み合わせでカスタムパイプラインを構築。
- オートフロー(全エージェントが順次実行)またはステップバイステップモード(各エージェントの出力を承認してから続行)で実行。
- エージェンティック・ミッション結果はShopifyに保存: 翻訳、SEOフィールド、メタフィールド、ブログ記事、コレクション、メディア。
- ナビゲーションメニューから最適化を開く。
- プリセット・エージェンティック・ミッションを選ぶか、「カスタム・エージェンティック・ミッション」で独自パイプラインを構築。
- エージェンティック・ミッション用の商品を選択。
- ブログ・エージェンティック・ミッション: トピックと任意のカテゴリーを入力。コレクション・エージェンティック・ミッション: コレクション名を��付け、商品を選択。
- 「エージェンティック・ミッション開始」をクリックして開始。
- オートフロー: 各エージェントの進行を確認。ステップバイステップ: 各ステップを確認し、承認/再生成/スキップ。
- 完了時、結果は自動でShopifyに保存。
- Basic: Social Hype-Man(リライター → FB/IG広告)、New Arrival Blast(リライター → Launch Email)、Welcome Journey(リライター → Welcome Email)、Artisan Storyteller(リライター → Hero Section)。
- Standard: Competitor Rebuttal(SEO → Product FAQ)、Abandoned Cart Fix(PriceScout → Abandoned Cart Email)、SEO Content Factory(SEO → Blog Post)、Collection Refresher(SEO → Collection)、Google Ads Shield(SEO → Google Ads)、Market Awareness Audit(SEO → PriceScout)。
- Pro: Full Launch(全6エージェント)、Visual Ad Blitz(Marketing → Visual Marketing)。
- 任意のエージェント組み合わせを追加: Rewriter、SEO、Marketing、PriceScout、Image Refinement、Visual Marketing。
- パイプライン内でドラッグしてエージェントの順序を変更。
- 各ステップの任意テンプレートを選択(例: Product FAQ、Blog Post、Launch Email)。
- 一部のエージェントはプラン制限あり(Image RefinementとVisual MarketingはStandard以上、画像クレジットで制限)。
- オートフロー: 全エージェントが自動で順次実行。結果はリアルタイムでストリーム。
- ステップバイステップ: 各エージェントは完了後に一時停止。出力を確認してから続行、再生成、またはスキップ。
- 最初の数回のエージェンティック・ミッションではステップバイステップを推奨し、各エージェントの貢献を理解。
- 最近のエージェンティック・ミッションはミッションビルダーの下に表示。
- 各エージェンティック・ミッションに表示: ステータス(完了、進行中、エラー、承認待ち)、使用エージェント、商品、時刻。
- 進行中または承認待ちのエージェンティック・ミッションで「再開」をクリックして続行。
- 完了したエージェンティック・ミッションで「全詳細を表示」をクリックして完全な出力を確認。
| 機能 | Basic | Standard | Pro | 備考 |
|---|---|---|---|---|
| 月間エージェンティック・ミッション数 | 1/月 | 3/月 | 無制限 | Freeプラン: 生涯3クレジット。 |
| テキストエージェント(Rewriter、SEO、Marketing、PriceScout) | ✅ | ✅ | ✅ | 全有料プランで利用可能。 |
| 画像エージェント(Image Refinement、Visual Marketing) | ❌ | ❌ | ✅ | Proのみ。画像クレジット(150/月)を使用。 |
| カスタムパイプラインビルダー | ✅ | ✅ | ✅ | エージェントの利用可否はプランによる。 |
| ステップバイステップ承認モード | ✅ | ✅ | ✅ | 任意 — デフォルトはオートフロー。 |
エージェンティック・ミッションが失敗または停止。
- エージェンティック・ミッションタイムラインでエラー詳細を確認。
- 同じ設定で新しいエージェンティック・ミッションを開始してみる。
- 失敗が続く場合、商品データが不足している可能性 — 商品詳細を追加。
エージェントが自動でスキップされた。
- 各エージェントのプラン対応を確認。
- 全エージェントが動作する十分な商品コンテンツがあることを確認。
エージェンティック・ミッションカウンターが0残りと表示。
- 請求日の月次リセットを待つ。
- より多くのエージェンティック・ミッションには上位プランにアップグレード(Pro = 無制限)。
エージェンティック・ミッションは結果をShopifyに自動保存しますか?
中断したエージェンティック・ミッションを再開できますか?
エージェントステップをスキップすると?
最初にどのプリセット・エージェンティック・ミッションを試すべきですか?
商品が日本語の場合、海外市場向けのSEO・価格分析はどうすればよいですか?
一括アップロード
CSVで最大10商品を一括アップロードして最適化 — テキストのみまたは画像付きフルローンチ。Proプラン限定。
一括アップロード
CSVで最大10商品を一括アップロードして最適化 — テキストのみまたは画像付きフルローンチ。Proプラン限定。
- CSVファイルで最大10商品(タイトル、説明、カテゴリー、ターゲット市場)を一括処理。
- 上限: 1回のアップロードにつき最大10商品。
- 2つのモード: テキストのみ(Rewriter → SEO)とフルローンチ(Rewriter → Image Refinement → SEO)。
- フルローンチモードはproducts.csvとimages/フォルダを含むZIPファイルが必要。
- 完了した商品はShopifyにドラフトとして自動作成。
- Proプランが必要。フルローンチバッチ開始前に画像クレジットを確認。
- ミッション画面からバルクミッション(Bulk Text UploadまたはBulk Full Launch)を選択。Proプラン必要。
- モードを選択: テキストのみ(.csvファイル)またはフルローンチ(.zipファイル)。
- products.csvを準備。必須列: row_id, product_name_ja, description_ja, category, target_market。
- フルローンチ: CSVにimage_ref列を追加し、images/フォルダ内の画像ファイル名を指定。すべてをZIPにパッケージ。
- 設定を構成: トーンプロファイル、Brand Soul、USユニット変換、ターゲット市場。
- 「Launch Bulk Mission」をクリックして処理を開始。
- 商品は順次処理されます。ステータスページで進行状況を確認 — ページを離れても戻れます。
- 完了した商品はShopifyにドラフトとして自動作成されます。
「Maximum 10 products per upload」エラー。
- CSVを10商品以下に減らす。
- 大きなバッチは最大10商品ずつに分割してアップロード。
「Batch requires N image credits but you have M remaining」エラー。
- CSV内の商品数を減らす。
- テキストのみモードに切り替え(画像クレジット不要)。
- 月次画像クレジットのリセットを待つ。
「CSV is missing required column(s)」エラー。
- 必須列を確認: row_id, product_name_ja, description_ja, category, target_market。
- フルローンチモードではimage_ref列も必要。
- 列名は大文字小文字を区別します。
「Image file not found in images/ folder」エラー。
- 各image_ref値がimages/フォルダ内のファイル名と正確に一致することを確認。
- ファイル名のタイプミスや大文字小文字の違いを確認。
- images/フォルダがZIPのルートレベルにあることを確認。
一部の商品が失敗し、他は成功。
- ステータスページで各商品のエラーメッセージを確認。
- 失敗した商品のみの新しいCSVを再アップロード。
- すべての商品に空でないタイトルと説明があることを確認。
一度にいくつの商品をアップロードできますか?
日本語の商品データをアップロードできますか?
テキストのみとフルローンチの違いは?
どのプランで一括アップロードが使えますか?
Dashboard
プラン確認、使用状況とクレジットの追跡、言語とターゲット市場の設定 — 1画面で完結。
Dashboard
プラン確認、使用状況とクレジットの追跡、言語とターゲット市場の設定 — 1画面で完結。
- 運用のコマンドセンター: プランステータス、使用状況追跡、機能の利用可否、連携。
- ミッション使用数、画像クレジット、月間��商品リライト数を追跡。
- コンテンツターゲット市場とアプリ言語を設定。
- ナビゲーションメニューからダッシュボードを開く。
- プランステータス、最適化済み商品総数、有効市場を確認。
- 使用状況概要でミッションクレジット、画像クレジット、リライト数を確認。
- コンテンツターゲット市場を設定してAIコンテンツのターゲットロケールを選択。
- アプリ言語を英語と日本語の間で切り替え。
- ミッション: 現在の請求期間の使用/総ミッション数を表示。Freeプランは生涯クレジット。有料プランは月次リセット。
- 画像: 使用/総画像クレジットを表示(Proのみ、150/月)。
- 商品リライト: 今月の使用/総リライト数を表示。
- 月次クォータのリセット日を表示。
- AI生成コンテンツのターゲット市場を選択(例: 英語US、繁体中国語台湾、韓国語など)。
- 全機能の言語、文化的トーン、競合分析に影響。
- 対応市場12: en、zh-TW、ko、de、fr、es、it、pt、th、vi、zh-CN。
- アプリUIを英語と日本語の間で切り替え。
- 全ページ — ナビゲーション、ラベル、ボタン、ツールチップ — にグローバルに適用。
- コンテンツ生成言語はコン�テンツターゲット市場で別途制御。
- ダウングレードまたはキャンセル時、猶予期間中は現在のプランが請求サイクル終了まで有効。
- 猶予期間中、以前のプランの全機能にアクセス可能。
- 猶予期間終了後、機能は新しいプランレベルに戻る。
認証エラー / 再接続バナー。
- 「再接続」または「セッションを更新」をクリックしてダッシュボードに戻る。
- 再認証完了後にアクションを再試行。
使用状況の数値がおかしい。
- ページを更新して最新の使用状況を取得。
- まだおかしい場合は、ショップドメインを添えてサポートに連絡。
期待していた機能がロックされている。
- ダッシュボードヘッダーで現在のプランを確認。
- 最近アップグレードした場合は、ページを更新して最新プランを同期。
- ロックされた機能セクションで必要プランを確認。